> ## Documentation Index
> Fetch the complete documentation index at: https://docs.aiandgpu.com/llms.txt
> Use this file to discover all available pages before exploring further.

# Chatwise 

> A Simple, Powerful and Privacy-Friendly AI Chat

## Chatwise Core Features

<CardGroup cols={2}>
  <Card title="Any LLM" color="#470aca" icon="microchip-ai">
    ChatWise supports any LLM model, including GPT-4, Claude, Gemini, and more.
  </Card>

  <Card title="Performance" color="#470aca" icon="gauge">
    ChatWise is built with performance in mind, and is optimized for desktop experience.
  </Card>

  <Card title="Privacy" color="#470aca" icon="shield-check">
    All your data is stored locally, and never leaves your device (except for sending chat requests to your LLM provider).
  </Card>

  <Card title="Simplicity" color="#470aca" icon="wand">
    Simple yet powerful, ChatWise is designed to be easy to use, without the bloat.
  </Card>

  <Card title="Multi-modal" color="#470aca" icon="globe">
    Chat with audio, PDF, images, text files, and more.
  </Card>

  <Card title="Web search" color="#470aca" icon="search">
    Search the web with Tavily or local browsers for free.
  </Card>
</CardGroup>

## Installation

Download Link: [https://chatwise.app/](https://chatwise.app/)

## Add AGCloud Configuration

Open Setting page to initialize provider configuration.

<Steps>
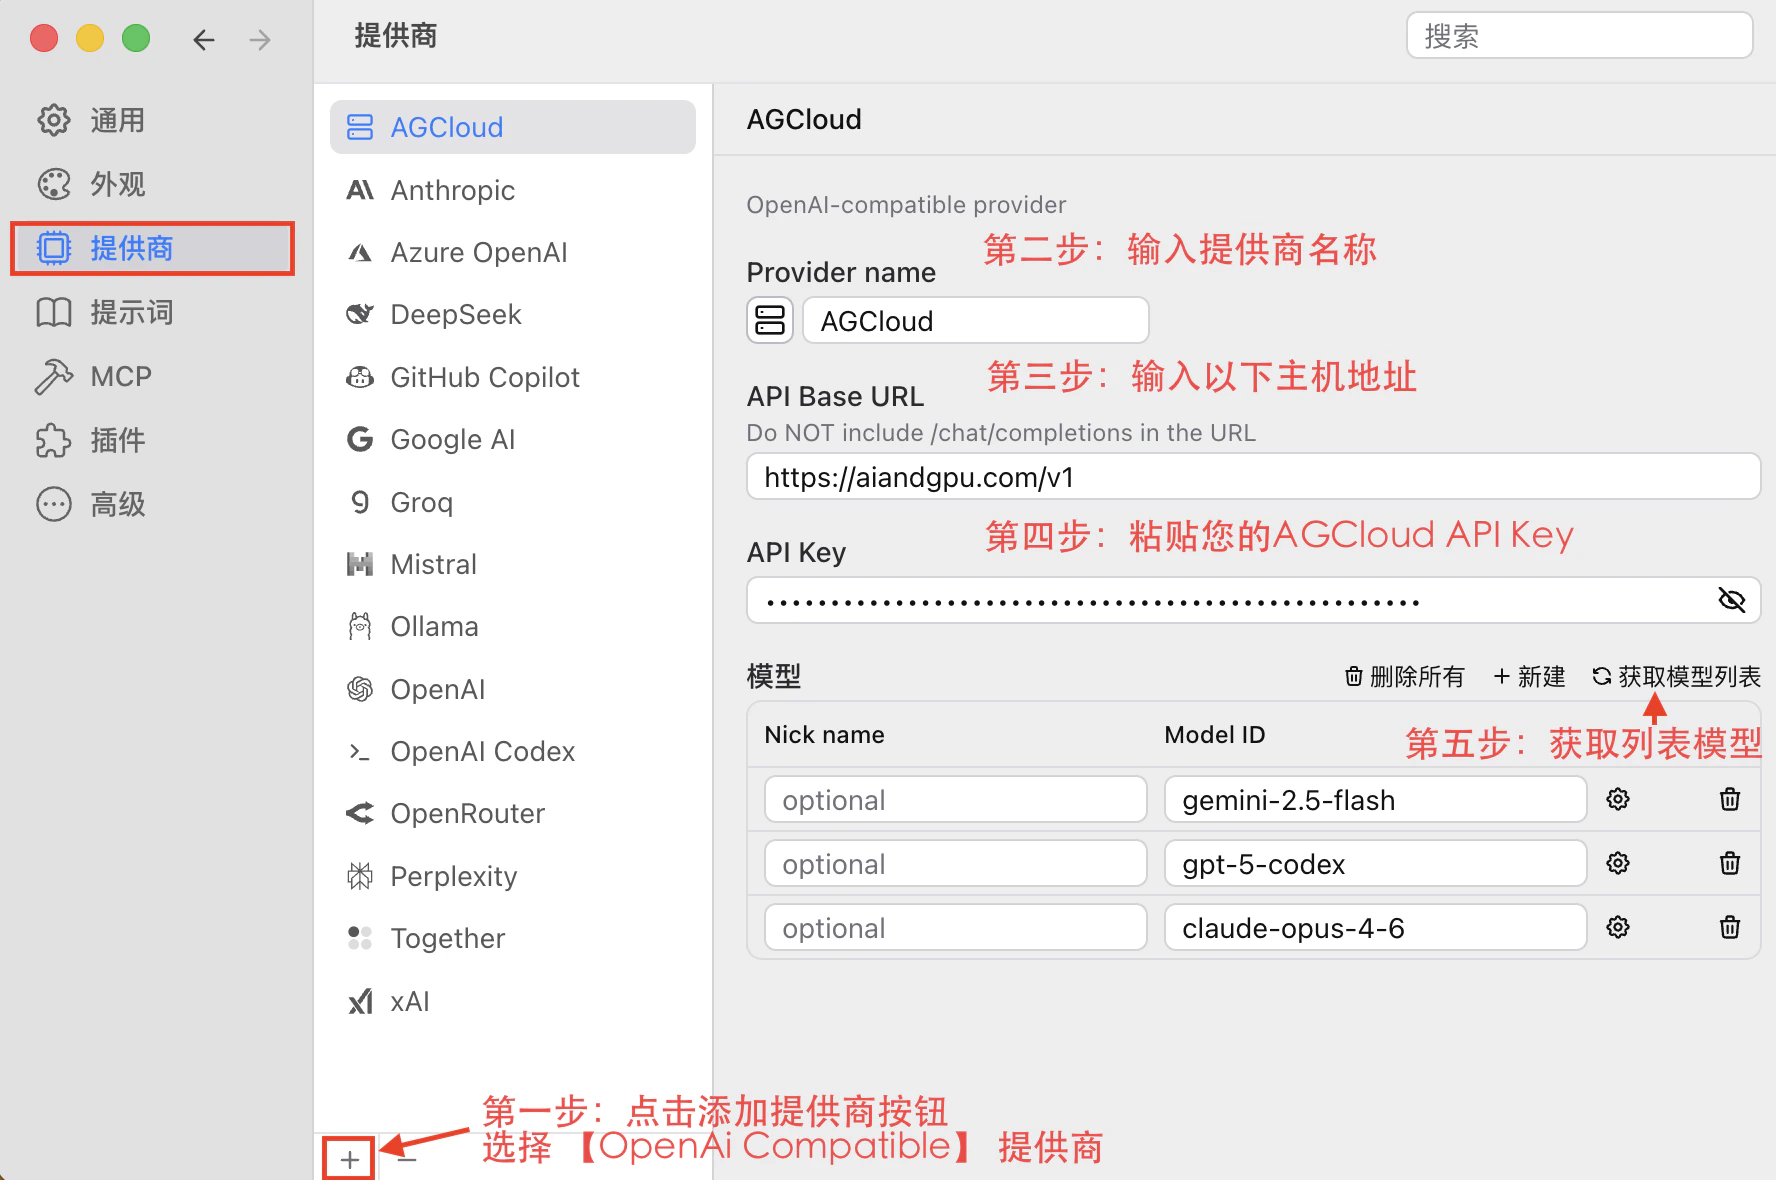
  <Step title="Add Provider">
    Open `setting` and click the "+" button to add model providers
  </Step>

  <Step title="Provider Name">
    Add our name `AGCloud` to the provicer's name
  </Step>

  <Step title="Fill Host URL">
    Paste the follow url to base URL: `https://aiandgpu.com/v1`
  </Step>

  <Step title="Get Your API Key">
    Generate and Copy your [**AGCloud API Key**](https://developer.aiandgpu.com/keys)
  </Step>

  <Step title="Refresh Models">
    Refresh all models in **AGCloud** platform
  </Step>

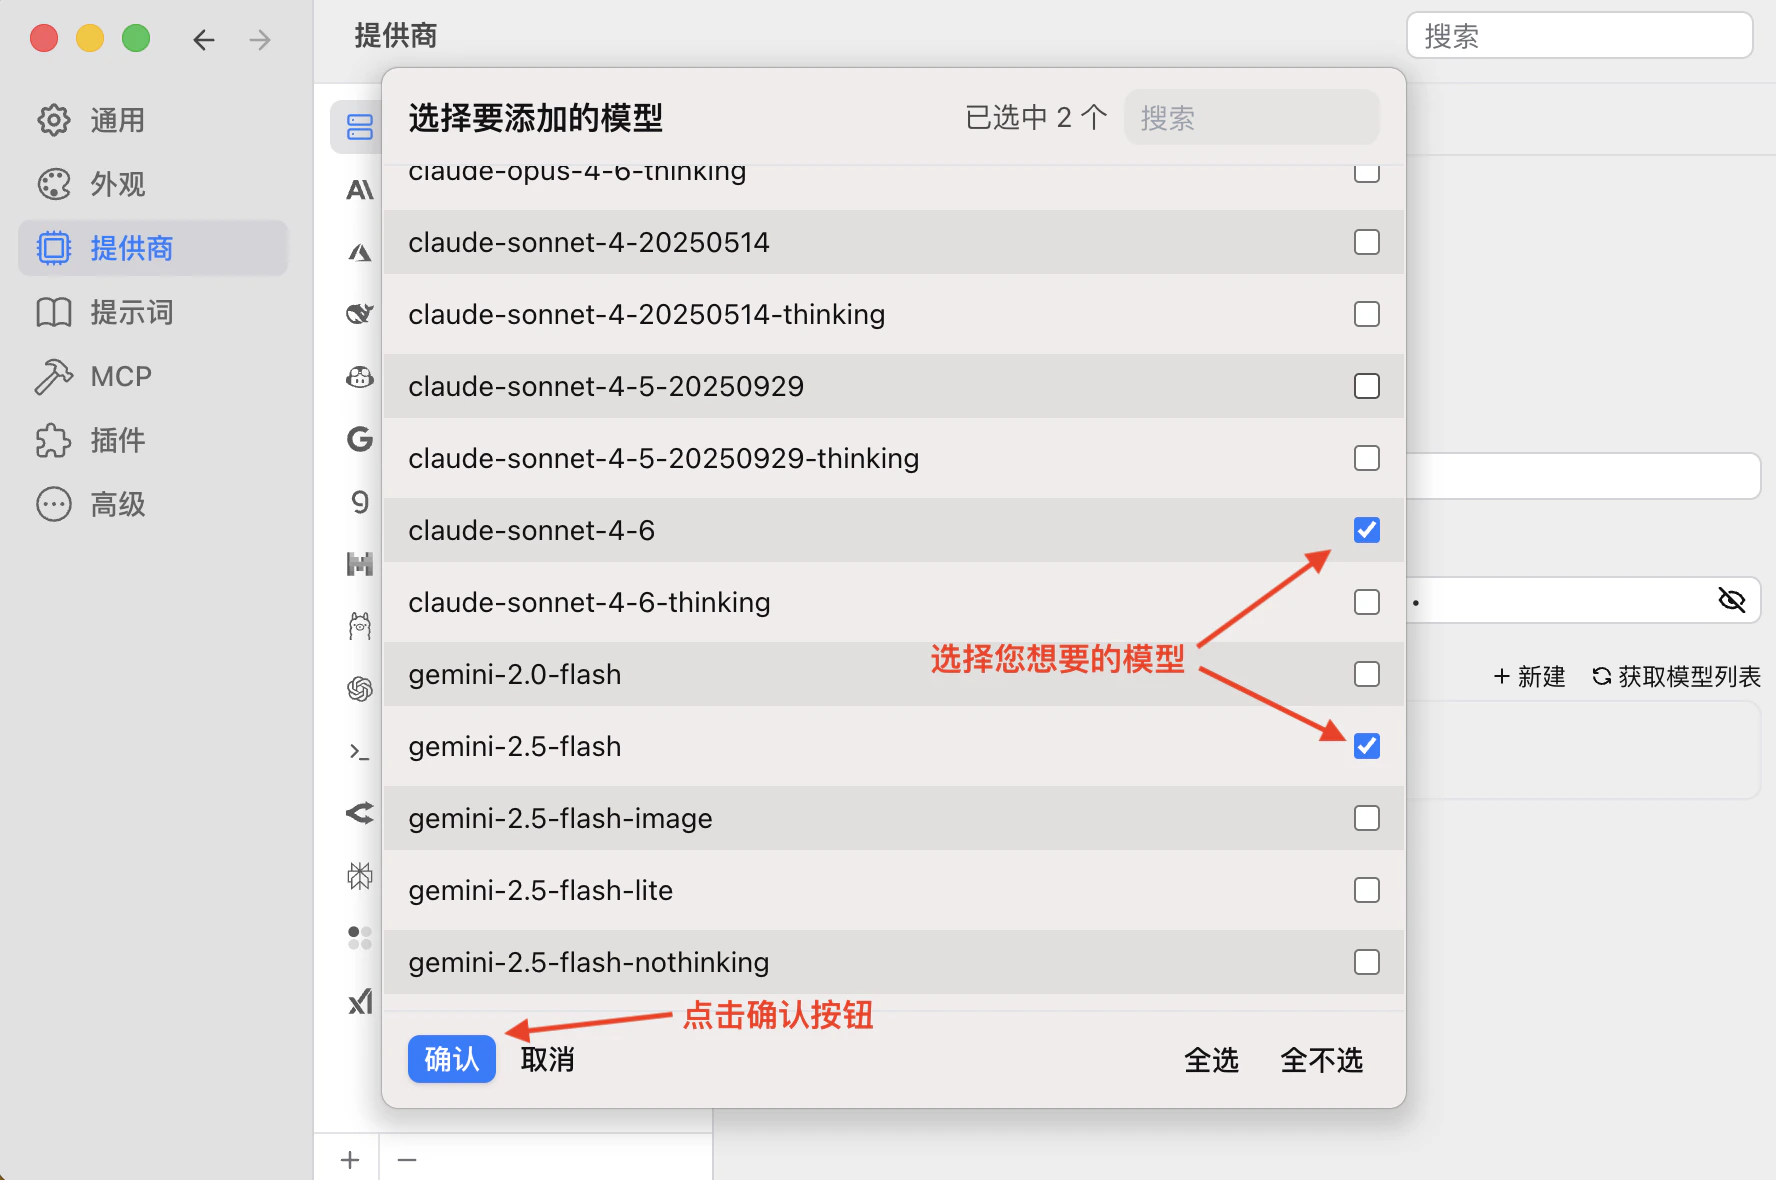
  <Step title="Select Models">
    Select that models you want to use
  </Step>

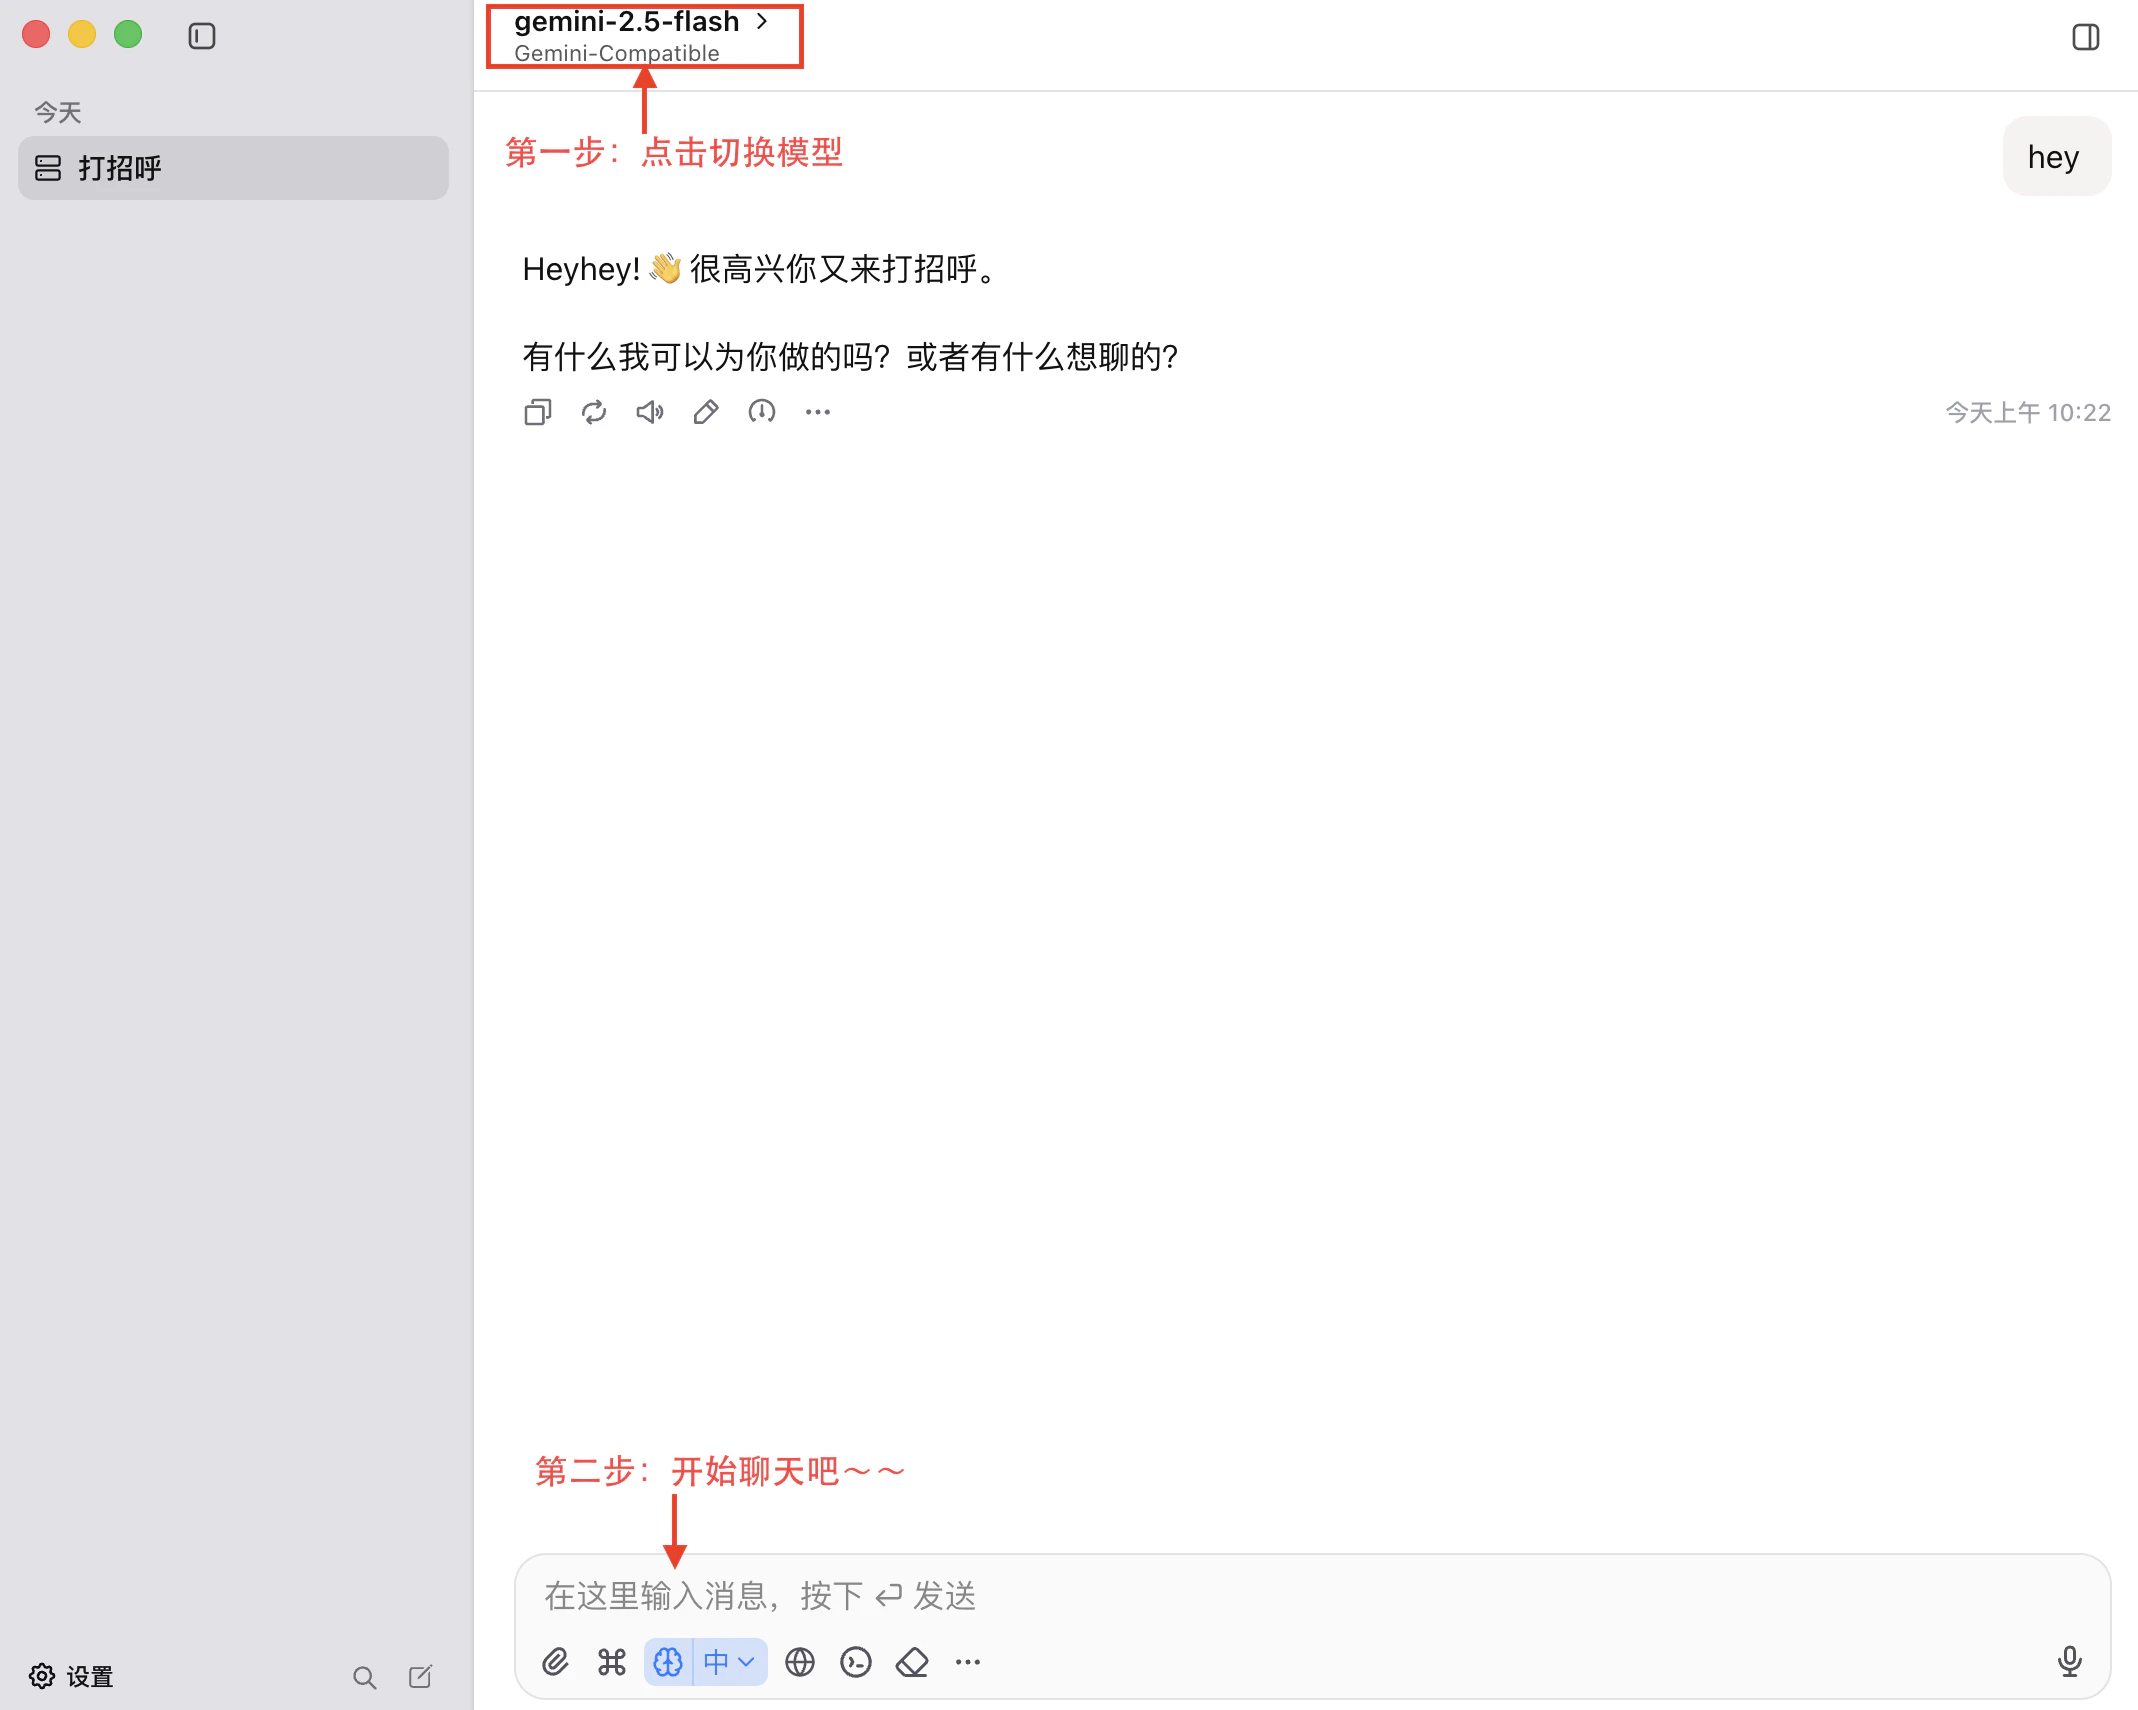
  <Step title="Start Chat">
    Return `home` and select the provider just added. Start with yourself
  </Step>
</Steps>

<img src="https://mintcdn.com/yvshun-470c5ffb/2qhv7eE08KB4knek/images/chatwise/step-1.png?fit=max&auto=format&n=2qhv7eE08KB4knek&q=85&s=65f2d9362bf09f75d8577fa50c46ba9a" style={{ width: "100%", height: "auto"}} width="1776" height="1180" data-path="images/chatwise/step-1.png" />

**Select Models:**

<img src="https://mintcdn.com/yvshun-470c5ffb/2qhv7eE08KB4knek/images/chatwise/step-2.png?fit=max&auto=format&n=2qhv7eE08KB4knek&q=85&s=e545467f4d57b68895aed5b34e7e1c43" style={{ width: "100%", height: "auto"}} width="1776" height="1180" data-path="images/chatwise/step-2.png" />

**Start Chat**

<img src="https://mintcdn.com/yvshun-470c5ffb/2qhv7eE08KB4knek/images/chatwise/step-3.png?fit=max&auto=format&n=2qhv7eE08KB4knek&q=85&s=a8c0d41b0411c9adf15eb3e56138a93e" style={{ width: "100%", height: "auto"}} width="2138" height="1710" data-path="images/chatwise/step-3.png" />

## Step 3: Start Chat

Close Setting page and select you have added provider model.

<img src="https://mintlify.s3.us-west-1.amazonaws.com/yvshun-470c5ffb/images/chatwise/step-4.png" style={{ width: "100%", height: "auto"}} />